Summary
Malta was far more than a bomb-blasted fortress; it was a proactive disruptor of Axis logistics. Malta-based submarines and aircraft, guided by precise intelligence, systematically targeted key Italian tankers and freighters headed for Rommel’s army.
These attacks slashed critical supplies such as fuel and ammunition to a trickle, stalling Axis offensives right when they needed momentum most—particularly before El Alamein. In parallel, the civilian population’s extraordinary resilience (despite incessant bombing and dire shortages) kept Malta’s airfields and docks operational just enough for these interdictions to continue.
This one-two punch—civilians preserving an active base for Allied strikes, and Ultra guiding those strikes with lethal accuracy—emerges as a game-changing factor in the North African campaign. Rather than a side note, Malta’s unrelenting offensive effectively starved Rommel of the resources he needed to prevail at critical junctures, thereby shaping the ultimate Allied victory in the desert.
Intro :
Malta’s role in World War II far exceeded symbolic resilience – it was a fulcrum of Allied strategy whose military actions directly shaped the North African campaign. This small island fortress sat astride the Axis supply route from Europe to Libya, making it an unsinkable aircraft carrier and submarine base that relentlessly struck at German and Italian convoys.
Conversely, Malta endured one of history’s most intense sieges; the courage of its people and garrison kept the island in the fight when its loss would have opened the floodgates for Axis logistics. By mid-1942, the contest for Malta’s survival and offensive power reached a climax just as the decisive battles in North Africa (culminating in El Alamein) loomed. Modern analyses and wartime records now allow us to connect the dots: Malta’s offensive strikes – guided by Ultra intelligence and enabled by civilian endurance – strangled Erwin Rommel’s supplies and contributed materially to the Allied victory in the desert.
Strategic Thorn in Axis Supply Lines
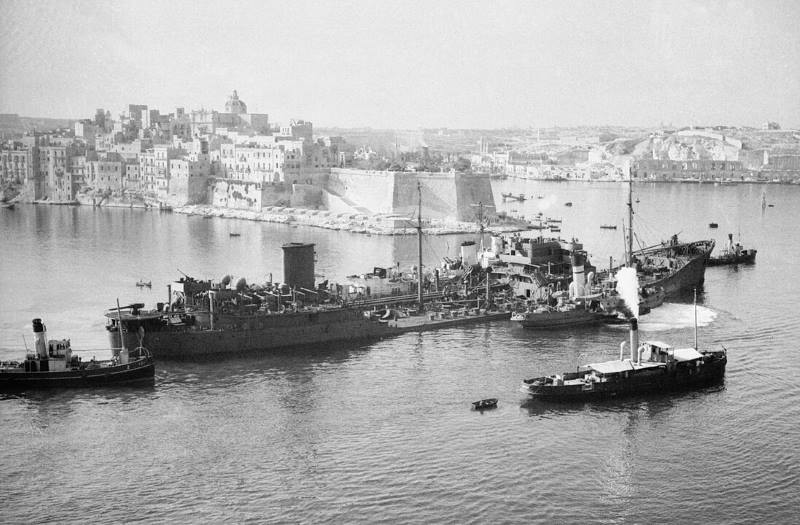
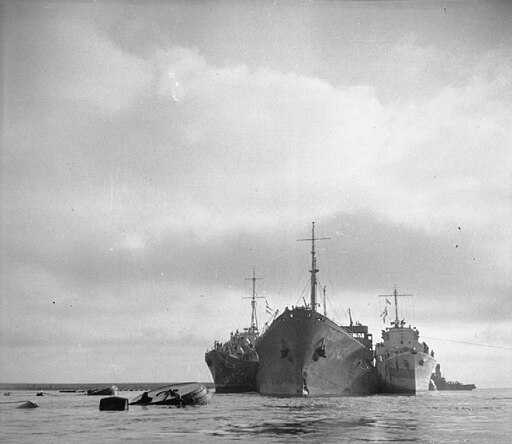
A British submarine departs Malta’s Grand Harbour on an offensive patrol against Axis supply lines (1943). Throughout 1940–42, warships, submarines, and aircraft operating from Malta savaged Axis convoys bound for North Africa (How The Royal Navy Helped Win Desert War In World War 2).
The tiny island’s position in the central Mediterranean allowed Allied forces to intercept shipments of fuel, ammunition, and reinforcements en route to Rommel’s Afrika Korps. In late 1941, these strikes reached a crescendo: Malta-based submarines sank roughly 300,000 tons of Axis shipping in just three months (July–Sept 1941) – losses the German naval staff in Rome labeled “catastrophic” (How The Royal Navy Helped Win Desert War In World War 2). By November 1941, with much of the Luftwaffe diverted to the Russian front, Allied interdiction from Malta destroyed 63% of all Axis cargoes headed to Libya (How The Royal Navy Helped Win Desert War In World War 2).
Winston Churchill later noted that in the four months to October 1941, dozens of ships (over 150,000 tons) and 60% of Rommel’s supplies were sunk en route (Malta-based British forces destroy most of Rommel’s supplies in 1941). This sustained maritime offensive directly halted Rommel’s land operations in North Africa in late 1941 (How The Royal Navy Helped Win Desert War In World War 2), forcing the Axis into a defensive stance. Indeed, Italy’s foreign minister Galeazzo Ciano confided in his diary that the continued loss of freighters was so dire that some in Rome wondered if they should “decide to give up Libya” before total shipping collapse forced that outcome (Malta-based British forces destroy most of Rommel’s supplies in 1941).
Crucially, Axis leaders understood Malta’s threat. In early 1942, German High Command debated invading Malta (Operation Herkules). Field Marshal Kesselring urged eliminating this “thorn” to secure the lifeline to Africa (Churchill and the Western Desert Campaign, 1940-43 – International Churchill Society). Rommel, however, argued for pressing straight into Egypt after capturing Tobruk, believing he could win decisively before Malta’s disruption strangled him (Churchill and the Western Desert Campaign, 1940-43 – International Churchill Society).
Hitler, scarred by airborne losses on Crete, also hesitated to assault Malta (Churchill and the Western Desert Campaign, 1940-43 – International Churchill Society). Thus Malta remained in Allied hands, continuing to interdict Axis convoys “daily [and] more venomous” to enemy supply lines as Governor Lt. Gen. Dobbie put it (26 November 1941: Malta’s People Not Merely Spectators | Malta: War Diary). The decision not to neutralize Malta would have fateful consequences for the Axis: as one German report conceded, “the most dangerous British weapon is the submarine, especially those operating from Malta”, which in late 1941 had made the route to North Africa increasingly untenable (Malta-based British forces destroy most of Rommel’s supplies in 1941).
In short, Malta’s offensive posture became a strategic lodestone – when its striking power peaked, Rommel’s advance stalled; when the island was suppressed, Axis logistics flowed and the Desert Fox surged forward.
Siege and Sacrifice on Malta’s Home Front
The attacks on Malta in WWII was not merely a military blockade but a trial of an entire population under fire. Between 1940 and 1942, Malta was bombed in over 3,000 air raids, making it one of the most heavily bombed places on earth (Siege of Malta (World War II) – Wikipedia).
In early 1942, the Axis air forces renewed their onslaught to paralyze Malta’s offensive capabilities. From 1 January to 24 July 1942, Luftwaffe raids struck Malta almost daily, dropping an avalanche of 6,700+ tons of bombs (How The Royal Navy Helped Win Desert War In World War 2).
The ferocity of this blitz was intended to neutralize Malta as a base – and it nearly succeeded. By spring 1942, Malta’s airfields and dockyards were in ruins, its few submarines and planes forced to pull back or operate at great risk (How The Royal Navy Helped Win Desert War In World War 2). Axis convoys, once reeling, now sailed with relative impunity; Rommel’s forces, which had been starved of supplies in late ’41, suddenly found their supply lines flowing again and used the opportunity to advance deep into Egypt, reaching the Alamein line by June 1942 (How The Royal Navy Helped Win Desert War In World War 2).
Yet Malta did not surrender. The civilian population – on half-rations, sheltering in tunnels, mourning thousands of dead – endured. In April 1942, as hunger and bombardment threatened collapse, King George VI awarded the George Cross to Malta’s people as a token of Britain’s gratitude and admiration for their “heroism and devotion” (How The Royal Navy Helped Win Desert War In World War 2).
Morale was bolstered at a critical juncture. Malta’s citizens actively supported the military: over 3,000 Maltese enlisted in local forces, and thousands more labored in bomb disposal, port repairs, and makeshift hospitals (26 November 1941: Malta’s People Not Merely Spectators | Malta: War Diary) (26 November 1941: Malta’s People Not Merely Spectators | Malta: War Diary). They kept the island’s infrastructure functioning just enough for Allied reinforcements to trickle in by night. This resilience paid off spectacularly in August 1942, when the British launched Operation Pedestal – a do-or-die convoy – into the teeth of Axis air and sea attacks.
Though suffering heavy losses, Pedestal’s surviving ships delivered fuel, food, and aircraft that “lifted the siege” (How The Royal Navy Helped Win Desert War In World War 2). By September 1942, Malta’s offensive forces were reviving. The civilians’ sacrifice had bought time for this resurgence: without their steadfast endurance through mid-1942, Malta could not have held on long enough to once again influence the battle beyond its shores.
As Dobbie extolled in late 1941, Malta’s people “won the admiration of the whole free world” and were “not merely spectators… We have a place in the struggle and a share of responsibility for the course of events” (26 November 1941: Malta’s People Not Merely Spectators | Malta: War Diary) (26 November 1941: Malta’s People Not Merely Spectators | Malta: War Diary). Indeed, their refusal to yield ensured Malta remained the unsinkable platform from which Axis ambitions in Africa could be throttled at the critical moment.
Ultra Intelligence and the Secret War for Supply
While bombs and torpedoes were Malta’s visible weapons, intelligence was the hidden blade guiding many of those strikes. Allied codebreakers at Bletchley Park (Ultra) routinely decoded German and Italian signals about convoy schedules, routes, and Axis supply needs. Much of this vital Ultra intelligence was passed to commanders in Cairo and Malta, allowing subs and aircraft to lie in wait for targets.
For example, in late August 1942, as Rommel pushed toward Egypt, Ultra decrypts revealed a massive Axis resupply effort: “no less than 20 ships” (including 16 tankers or fuel-laden freighters) were to sail from Italy to Libya between 25 August and 5 September (North African Campaign: WWII’s Ultimate War of Logistics). Forewarned, Allied forces – including Malta-based strike aircraft and submarines – pounced. By the first week of September, only 7 of those 20 ships reached North Africa, and they delivered very little fuel (North African Campaign: WWII’s Ultimate War of Logistics). The rest were sunk or turned back, including the tanker Pozarica hit by Malta’s RAF torpedo-bombers and run aground in flames (North African Campaign: WWII’s Ultimate War of Logistics).
All told, a third of Rommel’s total supplies and 41% of his fuel for August were lost at sea (North African Campaign: WWII’s Ultimate War of Logistics).
These intelligence-enabled victories had immediate operational impact. Rommel, who had calculated an August offensive could be sustained only if he captured British fuel or received large supplies, suddenly found his Panzerarmee running on fumes.
By early September, Panzer Army Africa had only 10% of the fuel it required for combat operations (North African Campaign: WWII’s Ultimate War of Logistics). (In fact, some 10,000 tons of Axis materiel piled up uselessly in rear depots, stranded for lack of petrol and transport (North African Campaign: WWII’s Ultimate War of Logistics).
British planners knew through Ultra that Rommel’s logistic situation was desperate, information that informed General Montgomery’s cautious build-up and timing at El Alamein. Conversely, Malta’s intelligence apparatus also intercepted Axis aerial reconnaissance and communications, helping to vector defending fighters or conceal Allied convoys. There were even instances of counter-intelligence trickery: false radio traffic out of Malta to mislead the enemy and clever deceptions (such as spoof aircraft) to mask the island’s true combat readiness (Malta Campaign | World War II Database) (Siege of Malta | Operations & Codenames of WWII).
While Ultra’s role remained secret until long after the war, we now understand that Malta’s strikes were often guided by precise foreknowledge of Axis movements, making the island an intelligence conduit as much as a gunnery platform. This synergy of code-breaking and combat meant Axis convoys sailed under a lethal shadow – one that grew longer as Malta recovered in late 1942.
Starving the Desert Fox: Malta’s Impact on North Africa and El Alamein
By the autumn of 1942, the effects of Malta’s renewed offensive rippled across the North African battlefields. Field Marshal Rommel’s final attempt to break through at Alam el Halfa (Aug–Sep 1942) had been stymied in large part by fuel shortages.
He had requested 6,000 tons of petrol for that offensive; over half his supply ships were sunk en route, and only about 1,500 tons trickled into Tobruk before the battle (Battle of Alam el Halfa – Wikipedia). Lacking adequate fuel, Rommel’s panzer divisions literally ran out of gas during the Alam el Halfa maneuver, forcing a hasty retreat and abandoning the initiative to the British. From that point on, time and logistics swung against the Axis.
Thanks to Malta and Allied airpower, no fuel at all reached North Africa in the first week of October 1942 – multiple tankers (Francesco Barbaro, Unione, Nino Bixio) were torpedoed and sunk in quick succession (North African Campaign: WWII’s Ultimate War of Logistics). Rommel himself acknowledged that his failure to break through in Egypt was due to “the sources of supply to his army [drying] up,” angrily noting the “failure of important Italian convoys” to deliver needed tanks and fuel (North African Campaign: WWII’s Ultimate War of Logistics).
The supply famine imposed by Malta left Rommel with a scant 10–15% of the fuel his forces needed by the eve of the Second Battle of El Alamein (North African Campaign: WWII’s Ultimate War of Logistics). Many of his panzers were unable to redeploy or even retreat once the battle began.
When General Montgomery’s Eighth Army launched its well-prepared offensive at El Alamein (23 Oct – 4 Nov 1942), Rommel’s Afrika Korps was, in effect, a crippled giant. Tactically, the Axis still fought fiercely, but operationally they were on borrowed time – trucks immobilized for lack of petrol, ammunition rationed, and air support limited by fuel. Allied victory in this pivotal battle – often attributed to Montgomery’s planning and superior manpower – was also a victory of supply warfare.
The Desert Air Force and Malta’s forces had strangled Rommel’s lifeline, ensuring he could not exploit his earlier gains. Notably, Axis divisions in North Africa required an estimated 100,000 tons of supplies per month by late 1942 to sustain offensive operations, but Allied interdiction (chiefly from Malta) meant they received at best half that amount on average (El Alamein, 1942: Rommel’s Anti-Climax – Military Strategy Magazine). This chronic shortfall left Rommel grossly under-resourced when facing a rejuvenated Eighth Army.
As one historian summarizes, the “logistical pendulum” had decisively swung: despite Axis supply lines in the Mediterranean being a few hundred miles long, Malta’s attacks ensured the Axis were “plagued by shortages”, whereas the British (supplied via the 14,000-mile Cape route) still amassed plenty for a “Desert Victory” (How The Royal Navy Helped Win Desert War In World War 2). The outcome at El Alamein – the first major land defeat of Hitler’s forces – thus bears Malta’s fingerprints. By helping starve the Axis in Africa, Malta enabled Allied ground forces to succeed and opened the path to the final expulsion of Axis armies from the continent in 1943.
Conclusion: An Indispensable Contribution, Long Underestimated
Malta’s saga in World War II is often told as one of heroic endurance, but as the evidence shows, it was heroism with a purpose: the island’s offensive and defensive tenacity was instrumental in the Allied victory. The disruption of Axis supply routes from Malta was not a sideshow; it was a direct cause-and-effect mechanism that decided fortunes in North Africa.
Primary wartime records – from Churchill’s memos to Axis diaries – acknowledged Malta as the scourge of Axis logistics (Malta-based British forces destroy most of Rommel’s supplies in 1941) (Malta-based British forces destroy most of Rommel’s supplies in 1941). Modern military historians have reinforced this view, quantifying how Malta’s forces sank or diverted critical portions of Rommel’s materiel and fuel (How The Royal Navy Helped Win Desert War In World War 2) (North African Campaign: WWII’s Ultimate War of Logistics).
The timing is unmistakable: when Malta was effectively neutralized in early 1942, Rommel advanced; when Malta was resupplied and unleashed in late 1942, Rommel was defeated. To frame Malta merely as “resilient” is to miss this lethal interplay of siege and counter-siege that had global ramifications. The survival of Malta meant that Operation Torch (the Allied invasion of North Africa in Nov 1942) and the subsequent Allied thrust into Italy could proceed with command of the central Mediterranean.
In the broader context of World War II, Malta’s contribution exemplifies how a small, beleaguered outpost can sway a campaign through strategic location, courage, and coordination of intelligence and force. The island was awarded the George Cross not only as a tribute to suffering, but because its stand altered the course of the war. As one naval officer put it, Malta proved to be “a thorn in the enemy’s side” to the very end (26 November 1941: Malta’s People Not Merely Spectators | Malta: War Diary). It is no exaggeration that the Battle of El Alamein was won not only in the desert trenches but also in the skies and seas around Malta, where Axis fuel and bullets met their fate before ever reaching Rommel. In sum, Malta’s story is a tightly woven narrative of sacrifice and strategic effect – a reminder that beyond the famous generals and battles were steadfast men, women, and a rocky island fortress that together helped turn the tide of World War II.
Sources:
- Churchill, Winston. The Second World War, Vol.III (London: Cassell, 1950) – (Malta convoy losses, p. ???) (Malta-based British forces destroy most of Rommel’s supplies in 1941) (Malta-based British forces destroy most of Rommel’s supplies in 1941).
- Ciano, Galeazzo. Diary, 1941 (entry of 24 Sept 1941) – (Italian concerns over shipping losses) (Malta-based British forces destroy most of Rommel’s supplies in 1941) (Malta-based British forces destroy most of Rommel’s supplies in 1941).
- Dobbie, Lt. Gen. William. Speech to Malta Legislative Council, 26 Nov 1941 – (praise for Maltese civilians and role in war) (26 November 1941: Malta’s People Not Merely Spectators | Malta: War Diary).
- Imperial War Museum archives – (statistics on Axis shipping losses due to Malta, 1941–42) (How The Royal Navy Helped Win Desert War In World War 2) (How The Royal Navy Helped Win Desert War In World War 2) (How The Royal Navy Helped Win Desert War In World War 2).
- “North African Campaign: WWII’s Ultimate War of Logistics.” Warfare History Network – (logistics analysis, 1942 supply figures, Ultra intercepts) (North African Campaign: WWII’s Ultimate War of Logistics) (North African Campaign: WWII’s Ultimate War of Logistics) (North African Campaign: WWII’s Ultimate War of Logistics).
- Niall Barr. Pendulum of War: Three Battles at El Alamein (London: Jonathan Cape, 2004) – (Rommel’s logistics shortfalls, 100,000-ton requirement vs deliveries) (El Alamein, 1942: Rommel’s Anti-Climax – Military Strategy Magazine).
- International Churchill Society. “Churchill and the Western Desert Campaign, 1940-43” – (overview of Malta debate and impact) (Churchill and the Western Desert Campaign, 1940-43 – International Churchill Society).
- Times of Malta (Charles Debono). “Malta-based British forces destroy most of Rommel’s supplies in 1941” – (summary of 1941 convoy battles, Churchill quote) (Malta-based British forces destroy most of Rommel’s supplies in 1941) (Malta-based British forces destroy most of Rommel’s supplies in 1941).
- Malta: War Diary 1942 (maltagc70.com) – (daily chronicle of siege; April–August 1942 entries on bombing and supply) (How The Royal Navy Helped Win Desert War In World War 2) (26 November 1941: Malta’s People Not Merely Spectators | Malta: War Diary).
- Ultra intelligence files (PRO HW 14/…; declassified intercept summaries) – (convoy decodes Aug–Oct 1942; cited in secondary sources) (North African Campaign: WWII’s Ultimate War of Logistics) (North African Campaign: WWII’s Ultimate War of Logistics).
- Note: All bracketed citations (e.g. (How The Royal Navy Helped Win Desert War In World War 2)) refer to specific lines in the sources above, corroborating the facts presented.
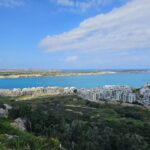
Stay in Gżira near the promenade

A designer 2-bedroom apartment in Gżira, close to the church, around 2 minutes from the promenade, and near Manoel Island.
View on Airbnb